Oct 23, 2017

Annual Tracing Vellum Sale

Sure-Fit Designs Blog
Those of you who use it - love it!  As most of you know, the Sure-Fit Designs Tracing Vellum is the best tracing medium to use when designing and drawing your sewing patterns.

All 3 sizes are at special sale prices.

The benefits?
Well...it's strong, durable, can be used as a press cloth and it's see-through which is great for seeing all the drawing details that you need to copy from the SFD Master Patterns and if you use any ink markers, there is absolutely no bleed-through.

And...
it's totally erasable!  Unlike many other tracing mediums, it simply won't go into holes or shred when you need to remove unwanted pencil marks.

Also,
it's available in 3 size options:
**10 yd x 24" wide - Reg. $12.95/roll...Buy one, get the second one at 50% off
(minimum 2 rolls of the same size need to be purchased to receive sale price).
Total for 2 (10 yd rolls) = $19.43 +S&H

**20 yd x 24" wide - Reg. $18.95/roll...Buy one, get the second one at 50% off (minimum 2 rolls of the same size need to be purchased to receive sale price).
Total for 2 (20 yd rolls) = $28.43 +S&H

**50 yd x 18" wide - Reg. $35.95/roll...Buy one, get the second one at 50% off (minimum 2 rolls of the same size need to be purchased to receive sale price).
Total for 2 (50 yd rolls) = $53.43 +S&H

It's great to have both the 24" and 18" wide options.  The 24" wide will be required for fuller bust and hip circumferences as well as for drawing wide sleeve patterns.  The 18" wide is great for smaller pattern pieces and there's simply less wastage with this narrower option. Consider having both widths to choose from for the most economical usage.

To purchase your supply, please click here - http://www.surefitdesigns.com/Sales-Promotions.html

These sale prices will be good through Wednesday October 25th 2017 - midnight.  Take advantage of the $ savings.

To purchase from our international distributors see the following:

Participating SFD Distributors (Vellum size options vary with each distributor):

In the
UK/Ireland/EU, please contact Judith Johnson 07968 486337 or go to http://www.surefitdesigns.co.uk/essential-tools-c102x3051512

In
Canada, please contact Anna Espindola 403-701-0801 or go to
https://surefitdesigns.ca/collections/sales-and-promotions

In Australia/NZ & the Pacific Rim, please contact Martha Schuster 0402 342 099 or go to
https://surefitdesigns.com.au/collections/essential-tools Australia sale dates Oct 21 - 24, 2017.

If you'd like to see the Tracing Vellum in action, here's a short video:


I know you'll appreciate using this excellent quality tracing vellum.  Go to:   http://www.surefitdesigns.com/Sales-Promotions.html

Thanks so much for your order.
Kindly,

Glenda...the Good Stitch!


Oct 17, 2017

Sewing the Waist Button Tab

www.surefitdesigns.com

Remember the canary yellow pants?
The designing instructions are found in the designing book Pants that Mix n Multiply.  In this blog I'm going to discuss the details about how to sew and apply the waist closure tab (In the book, I've called it the Buttonhole Extension Piece).

First of all the left side is closed using an invisible zipper.  (Sure-Fit Designs offers great, easy instructions for applying an invisible zipper in the 4-DVD tutorial set called Make it Sew.  Here you'll find my video instruction for enclosing the bottom of the zipper tape so that you don't get scratched.

Then, you add 1" (2.5cm) wide elastic at the waist edge.  Zigzag it in place thereby attaching it to the top edge of the pants.

Then start constructing the Waist Button Tab (the Buttonhole Extension Piece).
The instruction book tells you to cut the tab shape 3" long by 1" wide.  Cut 2.  Make sure to interface one side for stability but also to stabilize for the buttonhole application.  Sew right sides together.  Trim and grade the seam allowance.  Then for smoothest results when turning right side out, make sure to notch the curved portion of the allowance as shown above.  Here's a close-up of the curve.


Now, turn the tab right sides out.

Press.  Then stitch the buttonhole at the curved end of the tab.

Place on the inside of the waist edge.  Turn the elastic over to enclose the cut end of the tab.
Stitch to secure.

And ta da!...the right side view.

Just add the button on the inside of the opposite side of the waist edge to finish.  This is really a great, easy and neat finish for the waist edge.

Happy Sewing!

Oct 10, 2017

Highlights from the Great British Sewing Bee Live

Well, the Great British Sewing Bee Live has come and gone for this year.

It was a lovely event and provided a great opportunity to get good exposure for Sure-Fit Designs, as well as help people to understand that they can achieve great fitting clothes without having to adapt and alter every pattern.

If you recall, I finished the last blog (Let's Get Physical) with the question of how would we get everything into the cars. Well the answer was; we didn’t even try. We sat in a lovely English pub the evening before and the Committee decided that we actually would hire a van. This was booked before we had finished our meal (courtesy of the pub wifi), and what a good move having a van proved to be.


Whilst it delayed our starting out on the Wednesday morning it didn’t matter. We were still one of the early birds at the exhibition centre.

When we arrived there were still a lot of preparations being undertaken on various stands but ours was ready for us to set up. Unpacked and stand set up off we went back home ready for the early start the following morning.

Overnight the foam carpet in the walkways was added to the previously bare floor. This must have made walking round the show much more comfortable. Here is a ‘before and after’ of our stand. What a remarkable transformation!


Life on the stand was very busy. It was evident that customers who have never heard of the Sure-Fit Designs fitting and sewing system before needed to see a demo to understand it. This is why Glenda’s videos on YouTube are so important outside of exhibitions. It is also why I was really glad to have Heather on the stand every day and additionally Charlotte (both daughters) on the Saturday to actually serve the customers. I spent all day, every day, doing demo after demo and goodness the crowds that built up whilst someone was being measured and pattern drawn were incredible. The picture was taken at the very end of the last day so doesn’t have the crowds that were normally surrounding the stand earlier in the day.

We got very little time to see the show and exhibition in action since we were so busy teaching in our stand, but it was lovely to see the Liberty in Fashion exhibition and many of the actual garments that had been created in the BBC TV shows, before the exhibition opened to the public.

The following are 2 video links you might enjoy watching.

YouTube Liberty in Fashion https://youtu.be/coJ0Bz0F8ng

YouTube BBC TV Makes https://youtu.be/P2cr5TDruqc

The show was packed with opportunities for people to learn. The open live lounge and all the workshops were full and busy every day.

But for me, the highlight was seeing the garments that Glenda and I sent to McCall’s actually being modeled on the catwalk. It is a shame I cannot post the videos with the music (due to copyright restrictions) because the music really was very appropriate for the style of garments. I have however included a touch of it in the Dresses video. I was touched that immediately after one of the catwalks (which occurred 3 times each day) someone rushed over to ask for the pattern for the long dusky pink dress which some of you may remember was made for Heather last year.

Below are 3 very short video clips of the Sure-Fit Designs garments that were modeled in the daily catwalk.  You must take a look...Just click on the links below.

YouTube SFD Dresses https://youtu.be/I67vYt1qBHk

YouTube SFD Casual https://youtu.be/oEyjs3wTb1Q

YouTube Full Catwalk Show https://youtu.be/-ehdNhxueA0

It was a very memorable event for me being the first Great British Sewing Bee Live exhibition, having the opportunity to represent Sure-Fit Designs in the UK, having the pleasure of meeting so many of our SFD customers in person (some of whom I have only previously known by name and not by face) and also receiving such positive feedback from visitors…

..and now a rest…oh no, got to start preparing for the Sewing For Pleasure Exhibition at the Birmingham National Exhibition Centre in March 2018.

Judith Johnson - Sure-Fit Designs distributor - serving the UK, Ireland and the EU countries.
www.surefitdesigns.co.uk

Thanks so much Judith for following up and sharing your Sewing Bee experiences with our SFD blog followers.  As I said before...sure wish I could have been there!

Glenda...the Good Stitch


Oct 3, 2017

Sept 2017 Fit & Sew Retreat - a Photo Story

www.surefitdesigns.blogspot.com

The September Sure-Fit Designs Fit & Sew Retreat, with another 6 lovely ladies, concluded 9/21.  I've put together some photos of their journey from Day 1 when we began 3 days of Pants Fitting and concluded with 3 days of Bodice Fitting. 

We had a variety of fitting issues, but all came out at the end with patterns that fit their unique body shapes.  Here's a selection of photos representing their journey.

Day 1 - the group photo


Then we began the bodice/blouse drafting & sewing.


The final group shot during our Celebration and Certificate event.

Happy accomplished students.
Well done everyone!


Sep 25, 2017

Newest Essential Tool - the Line Drafter - from Sure-Fit Designs

www.surefitdesigns.blogspot.com

'Now...this is a tool I can use'!


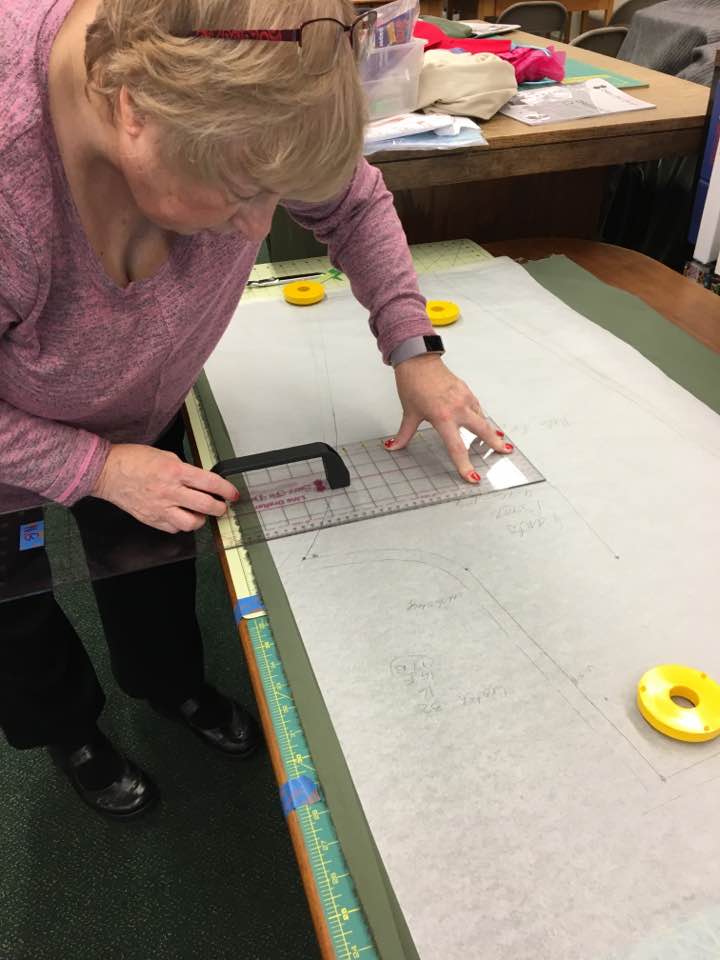
Whether you are a crafter, quilter or garment seamstress, you'll love this latest essential tool...the Line Drafter.  An attached handle gives you that great grip offering extremely easy maneuverability and insuring a steady edge for drafting or cutting all the lines you need.


You'll get a good grip...it will never release (like suction cup handles often do).  You'll obtain precision and accuracy with every drawn or cut line, on vertical or horizontal surfaces, which all ensures accuracy and success with all your projects! And yes...it's stable & see-through.

We're introducing you to this essential tool with a grand opening offer:

From Sept. 26, 2017 through October 3, 2017

Save with this special...

Regularly $39.95....now $35.95

CLICK HERE - LINE DRAFTER


Specifications:
1. 24" x 6" (61x15cam) - which is great for long grainline markings
2. 1/8" thick clear plastic - it's see-through, rigid & stable for easy maneuvering
3. Offers both rules - Imperial (inches) and Metric (mm & cm) for our international customers
4. Has 5/8" (16mm) seam allowance guide on both long sides
5. Has 3/8" (10mm) seam allowance guide on one short end
6. Has 1/2" (13mm) seam allowance guide on the other short end
7. Offers 45 degree angle lines for all your true bias lines and cuts
8. Has 1" (2.5cm) grid lines making drawing parallel lines a breeze

9. It's all about the Handle: The Line Drafter features a permanently attached handle making maneuverability fast and easy on both vertical and horizontal surfaces!  The handle depth is ideal for a woman's hand to get a solid grip, and yet deep enough for a man's (larger) hand.  And...it's not obtrusive or too large so that it doesn't obscure the ruler markings.

If you'd like to see a short video on the multiple uses of the Line Drafter, click this video link:

https://youtu.be/TQjqVUr5K7U

'This really is a tool you can use'!

We're introducing you to this essential tool with a grand opening offer:

From Sept. 26, 2017 through October 3, 2017

Save with this special...

Regularly $39.95....now $35.95

CLICK HERE - LINE DRAFTER

For our international customers, please click through to your respective distributor:
In South Africa go to: www.surefitdesigns.co.za

In UK/Ireland/Europe go to: www.surefitdesigns.co.uk

In Canada go to: www.surefitdesigns.ca

In Australia/NZ/Pacific Rim countries: go to www.surefitdesigns.com.au

Here's a couple of photos of ladies using the Line Drafter in the recent September Fit & Sew Retreat.  They expressed how beneficial it was.


Happy Drafting!

Glenda...the Good Stitch


Sep 19, 2017

Canary Yellow Princess Seam Pants

www.surefitdesigns.blogspot.com

Before summer was totally over, my intention was to sew up this BRIGHT patterned fabric into a pair of princess seam pants...and they're done!  Let's take a look.

 The Front...

 The Side...

The Back...

Since the floral pattern kind of camouflages the princess seam up the center of the back leg, here's a close up view.

The princess seam gives you an opportunity to sew shaping into the back of your pants and anyone with a flat butt will really appreciate this design and fitting feature.  Even ladies with larger hips in relation to thin legs, the princess line really helps to shape the back of the pant leg to your body contours.

Here's a video on how to add the princess seam to your pant leg: 
In case you're not able to see this video in your email software, here's the YouTube link


The instructions for drawing and sewing this style of pant is actually found in the designing book - Pants that Mix n Multiply.  It's Style #1.  I love this waistband treatment - it's just 1" wide non-roll elastic turned to the inside.  They have an invisible zipper and an inside button tab.  It's so comfortable to wear.  I designed a much skinnier leg style than what is shown in Pants that Mix n Multiply, but that's just a matter of narrowing the leg (and we have a free video showing how to do this.  Just go to www.SFDLearningCenter.com to the Video Library - look in the Pants Videos for P.6.11 - How to Narrow the Pant Leg).


After narrowing the leg, I added short vents at the hem.  For any really skinny pants, they help to get the hem opening over your ankle.


Those of you ladies who are attending the upcoming September Fit & Sew Retreat will see me wearing these pants...oh what to wear on top?  When I bought this pants fabric, I chose a complimentary royal blue knit for a wrap crossover top.
So far, that's as far as I've gotten - draping it on the mannequin.  When I was going through my fabric stash (for something else), I came upon a soft yellow knit that I'd originally used for the Waterfall Jacket.  The soft yellow was just perfect to compliment the bright yellow in the pants.  And since I didn't have time to sew the blue top too, I chose to use a tried and true pattern - my Center Front Gathered Tank Top.


You'll find complete directions for this Tank Top on this Digital Fashion Leaflet.  And the directions for the Waterfall Jacket are on this Digital Fashion Leaflet.
And for those of you who might be reading this blog for the first time, all of our current Digital Fashion Leaflets are found on this page.

Try back leg princess seams in your pants for enhancing the fit under the butt...this really does work!

Happy Sewing!
Glenda the Good Stitch