Dec 29, 2015

Out with the Old & in with the New!

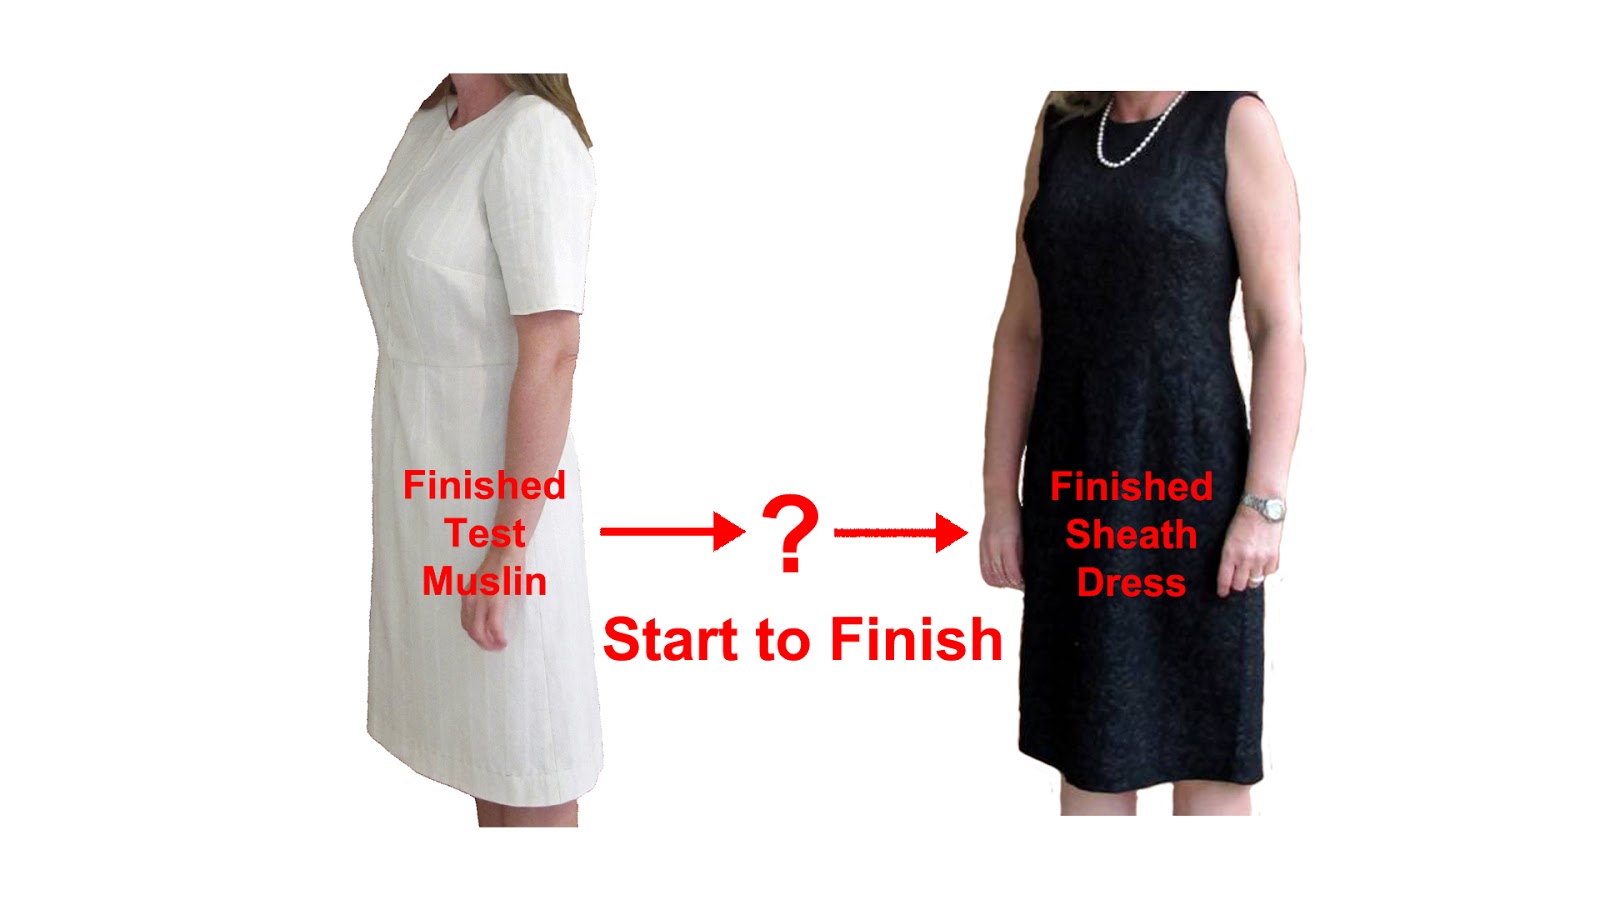
For the last blog post of the year, I'd like to share with you my latest designing video.  It's another one of my 'triple espresso' fast-forward videos showing you how to design the basic sleeveless Sheath dress.  Of course, you need to start off with your well-fitting SFD Dress Kit personalized dress muslin, just as our SFD customer, Caroline, has done.
 
Then, follow the directions in this Sheath Dress Designing video.  When the videos are the 'triple espresso' variety, they show the essence of the designing details without my superfluous talking (and I can tend to get carried away).


Caroline has added sleeves in the pink sheath dress version.  Whether with or without sleeves, when sewn with different fabrics, you'll achieve the best-fitting dress for so many different occasions.  It's a great way to use the fabrics in your stash!
 
We plan on filming more 'triple espresso' designing videos in the coming year along with other projects.  Please comment below if you like this fast-forward format...and what specific designs you might like to see.

Once again, I'll take this opportunity to thank you for being the best customers I could ever want!  Your loyalty and enthusiasm is what spurs me on to always be thinking of the next project to share with you.

Happy New Year!

Dec 22, 2015

Merry Christmas!


To you and yours...and to let you know how much we at Sure-Fit Designs appreciate each and every one of you.

'Tis the season to wish all of you a very Merry Christmas and an especially Happy New Year!


Dec 15, 2015

Upper thigh Dart/Wedge: A Way to Help Remove Under-the-Butt Wrinkles

If you have baggies under your backside, there are a number of alternatives for removing them.  This accompanying photo is a little on the grainy side (sorry) but it does show you what this situation might look like.

Horizontal Upper Thigh Dart/Wedge

This refinement may help your situation.  Pinch out an pin a dart/wedge from the upper, inner thigh on both front and back going to nothing at the side seam.  You have to do this on front and back so that the inseams remain the same length.


Try the pants on.  If this helps, then baste this dart in place and try them on once more.  If you're satisfied with the result, then follow these instructions to make this change on your pants blueprint.


1.  Draw a line perpendicular to the straight of grain from the inseam to the side seam.

2.  Cut from the inseam to the side seam, leaving a paper hinge at the side seam.  Overlap to remove the width of the dart/wedge.

True the inseam.

Redraw the straight of grain from the leg upward.


3.  Even though this process does not change the length of CF or CB crotch curves, it does tilt them.  If you do this on a grid/grain board, you will be able to determine the amount of the tilt.

Cut this amount off CB and add it back on to side back.  Do the same for CF.

This will straighten the CF, CB and side seams to their original positions.

Revised Muslin Test
Needless to say you will need to sew a test with these changes incorporated.  You may need to adjust the direction of the darts as well as evaluate how the waist edge is now sitting on your body.

Alternative Tune-Ups 
For other tune-up alternatives, see:
1.  Pants Kit Instruction Book - page 15#11


Happy Sewing,
Glenda...the Good Stitch!


Dec 7, 2015

Celebrating the new Sure-Fit Designs website - FREE Shipping Dec 8 & 9

The finishing touches have been laid in place and Santa is coming to Sure-Fit Designs Dec. 8 & 9.  He's bringing all of you in the USA FREE shipping and 50% off shipping for International customers.  We've never before offered Free shipping, so it's an opportune time to shop for Christmas...for yourself or give the gift of Sure-Fit Designs to a special sewing friend.
See the new look at Sure-Fit Designs.

http://www.surefitdesigns.com/Index.html

No coupon or discount code is required...simply choose $0.00 shipping when checking out of the Shopping Cart.
For our International Customers, due to software limitations, please place your order and add the full amount of shipping as you normally would.  When your order is received, we will issue a 50% refund on the amount of shipping that you paid.

Free Shipping (USA)...1/2 price Shipping (Int'l customers)

December 8 & 9, 2015


What's new and different on the website?

Social Sharing icons & Language Translator:
Handy social sharing icons are now at the top of every page.
For our foreign language customers, use the Language Translation widget at the top right of every page.

Search Window & View Cart:
Every page now features a Search Window to help you better find what you're looking for.
When purchasing products, it's now very easy to view the items you've placed in your Shopping Cart with the View Cart button.

New Store Categories:
All Sure-Fit Designs products, kits, tools have been consolidated into 6 easy to reach categories.

Information Departments:
Information is easily accessible by clicking on any of these select image boxes.

The Sure-Fit Designs Learning Center:
The Sure-Fit Designs Learning Center is still a separate website.  It also has been updated.  You'll find numerous articles and videos beneficial for all your fitting, sewing and designing needs.  Please note, that when in the Learning Center, if you want to shop and click on the Store icon, it will take you (back) to www.surefitdesigns.com.  All shopping will now be conducted exclusively on www.surefitdesigns.com.


Please offer feedback on the look and feel of the new websites - Comments below are always welcome.  If you find any glitches or kinks, please make sure you email me directly at info@surefitdesigns.com.

PS - the mobile version is still under construction...hope it will be done soon.  In the meantime you can still view the new SFD site in Classic mode on your smart phone.  It also opens up just fine in tablets and Ipads.

Happy Browsing!

Dec 1, 2015

Triple Espresso or Decaf? Basic Blouse Designing 101


Everybody always asks how to design/draw a simple, straightforward blouse once their bodice muslin has been refined - much like the blouses that Joy from JoyFul Expressions wears.
It's time for Basic Blouse Designing 101!
You can choose the Triple Espresso Fast Forward video version - only 1 minute long (I promise)
or
View the slower Decaf/Tea video version - about 15 minutes long.
Have fun either way and see how easy this process really is.
Of course the blouse is designed from you SFD Dress Kit bodice.


The triple espresso version...Basic Blouse Designing 101 at lightspeed -

Or the longer decaf/tea version -


The result...

Drawing and designing a basic blouse really is this easy and simple. When your test muslin has been refined to your special body shape, the next step is moving on to real clothing.

I know you'll have fun doing this.
Comments & feedback welcome.  Would you like more short, fast designing videos?

Happy Sewing!

Nov 24, 2015

Reducing Skirt Waist Ease

You all likely know that you can use your Dress Kit Skirt pattern to sew stand-alone skirts.  But in doing so, we need to address the waist ease that's allowed in the pattern.  Keep in mind that the waist ease in the bodice is 1" (2.5 cm), so when you sew the skirt together with the bodice for either a one or two piece dress, the skirt waist also needs to end up with 1" (2.5 cm) of waist ease, which of course, it does.


But now you'd like to use the skirt pattern as a stand-alone skirt.  The 1" (2.5 cm) of wearing ease is too much.  You are going to want to reduce the finished amount of ease to approximately 1/2" (1.3 cm).  When the darts are sewn in position, that's plenty of ease to tuck in a blouse or lightweight sweater.

Here's a short video to actually show you the process.


As I've said many times, how much wearing ease you actually end up with is very personal preference.  You may want more or less ease, but at least now you know the process.

Also remember that there are written instructions in your Dress Kit instruction book on page 29.

Happy fitting & sewing!


Nov 17, 2015

Sleeve Length - Is yours right for your arm?

Oh my, I must have measured too incorrectly!  My elbow dart is not
pointed toward my elbow.  How do I easily fix the elbow dart position
and length of the sleeve now that my pattern is already drawn?

I've had more than one customer write and ask for help.  This may have
happened with you.  The best way to explain the easy tune-up is in the
video below.


Happy Sewing & Fitting!
Glenda...the Good Stitch!

Nov 10, 2015

Speaking of Copying Ready-to-Wear...

In last week's post, I shared with you the gorgeous dress that Caroline (from Chile) copied from a Dolce & Gabbana original using her perfect-fitting SFD bodice and skirt.  You all know that when you have a tried and true basic bodice and skirt pattern, that you really can copy expensive ready-to-wear designs and know they are going to fit.
Inspiration...let's take a look at this dress.
this Inspiration Dress from Lafayette 148 sells for $598

And the woman who copied it sews her own clothes, though not with Sure-Fit Designs.  Her name is Carolyn - and her blog is Dairy of a Sewing Fanatic.  You might be interested in seeing her accomplishments.

Here's both the front and back views and she looks great in this dress.

If you'd like to read Carolyn's blog for this specific dress creations, Click Here.
How easy this would be to draw the same design lines on your SFD bodice & skirt.

I hope this inspires you to look to ready-to-wear for ideas and sew with confidence.

Happy Sewing!
Glenda...the Good Stitch! 

Nov 3, 2015

The Perfect Fit!

One of our SFD customers, Caroline from Santiago Chile, is a perfectionist. And look at the results!  Caroline wanted her SFD Dress Kit bodice and skirt fit to be just perfect and 'perfect' she achieved.  She'd already sewn a couple of test bodices, and was basically happy with the results.  But she sent me this photo asking how to remove the final issue, being the small fold in the lower third of the armscye.  (See the orange arrow).  Other than this small fold, she'd achieve almost total perfection - wouldn't you agree?
My instructions to her were to fold this small amount out of the armhole and let it open up in the side bust dart.  But when I received her email I was on a short vacation...and she was heading to a wedding the next day.  So she went ahead and sewed her fashion dress without this change.  She copied a Dolce & Gabbana designer dress and off to the wedding she went.
 The D & G designer original.

She didn't have time for the custom belt, but it was coming...just after the wedding.  Isn't this setting in Santiago beautiful - just perfect for a wedding.

But after the wedding, Caroline went ahead with the armhole and bust dart refinement.  Even though this next photo is a little fuzzy, you can see that she overlapped the amount of the fold in the armscye and let it open up in the side bust dart.  See the orange arrows.

This process shortened the front armscye, which means the sleeve cap front needed to be shortened as well so that there wasn't too much to ease into the armscye.  Here's a look at her finished bodice pattern pieces.

Here's the final 'muslin' - fit to perfection.


Then, she hand-crafted the complimentary belt.

The result is stunning.  Wouldn't you agree it fits her to a 'T'?

If you'd prefer to watch a short video on making this pattern refinement, please click on the video below.


Here's one last look at this awesome setting.
I know she'd love to hear your praise...just leave a comment below...she deserves lots of cudos!

Happy Sewing!
Glenda...the Good Stitch!

Oct 27, 2015

** News Flash - Shirt Fitting Course on DVD

It's been a couple of months in the making, but it's finally ready to unveil.  This new Shirt Fitting Course on DVD completes the SFD instructional DVD fitting courses.  As so many of you know, we introduced the new Shirt Kit in early 2015.  Now there's complete and detailed pattern drawing, sewing and fitting instructions to go along with it - all on this new 2-DVD set.
This short video gives you highlights of what's in the course and what you can expect.

This 2-DVD set contains 3.5 hrs of detailed instruction with great close-ups.  I know you'll benefit greatly by following along as I take you through the entire process of drawing your SFD Shirt pattern.  Of course, I show you complete sewing construction steps, fit evaluation and minor tune-ups if you need them, how to add a dart and how to add piping.  You can see this DVD set is packed full.  For those of you reading this blog who don't yet have the SFD Shirt Kit, you will need that along with the Designing Stylus and some Tracing Vellum.

As an opening special, we're offering a 20% discount for this DVD set.  But if you want to add either the Shirt Kit or the designing book Sew Sensational Shirts, you'll receive a 25% discount.  The choice is yours!


These introductory specials will run through Monday November 2, 2015.  When you place your order in the Shopping Cart, simply enter in either Discount Code - SFC20 (for the DVD only) or SFC25 (for one of the product combinations).
By the way, this new DVD also comes with  20-page downloadable Instructional Materials.
You get complete written instructions for the process of adding a Continuous Lap Sleeve Placket, and 2 new Fashion Leaflets: the Camp Shirt and Women's Cargo Jacket.  I hope you enjoy designing and wearing both.  They're both casual yet smart and of course, all from your SFD Shirt Kit!

To get the introductory special pricing on this new DVD course, just click here - SFD Shirt Fitting Course on DVD.

Happy Sewing!