Dec 26, 2012

Assembling a garment - A Resource Guide

Last week I gave you a comprehensive list of where to find specific sewing instructions in each of the Sure-Fit Designs kits.  This week, I'm providing a resource of general procedural steps when assembling a garment.  Whether it be pants, a skirt, blouse or jacket this list of 'what should happen first, and second, and third etc. will apply generically to pretty much any project.


When you’ve sewn for ages your mind kicks into gear when constructing a garment.  What do you do first?  What do you sew next?  You kind of know the order in which things should be done.  But for the novice, it might not be so obvious. Use these guidelines and you’ll generally be well on your way to a comfortable level of knowing how to sew something together.

First, do as much work on a major pattern piece as possible before joining them to another major piece.  All darts, pleats, tucks and style lines (like princess lines) would be sewn first.  Sew side seams and shoulder seams only when you can’t do anything more on the major piece.  This makes pressing easier, simplifies the sewing process, makes the garment easier to handle in the machine and the entire construction process will take less time.  
 

Read through these steps first, then analyze them in relation to the garment you want to sew.  Eliminate those that don’t apply, but stay with the general flow of steps.
  1. Attach any interfacing.  Whether for a blouse, dress, coat, shirt or waistband of pants or shirt, do this first.
  2. Darts, tucks, pleats.  Do these next.
  3. Sew style lines.  Does your pattern have style lines like princess lines or yokes?  Anything that is not a shoulder or side seam should be sewn now.
  4. Pockets.  Apply them to the major piece taking care that they are balanced from one side to the other.
  5. Insert the zipper.  If possible insert the zipper while the major piece is still flat, but if it is a dress with a waist seam and the zipper extends into the skirt, it will be applied later.
  6. Shoulder seams generally come next.
  7. Sew a 'shirt-style' sleeve.  The lower, flatter sleeve cap lends itself to sewing into the front and back armscye at this time.
  8. For shirts, sew side seams from hem up through underarm to sleeve hem edge.  For pants, sew inseams and side seams.  For a dress, if the design has an attached skirt, sew the skirt and bodice side seams separately, but don't attach skirt the skirt to the bodice yet.
  9. For pants, sew crotch seams.
  10. Sew waistband or facings for pants/skirts. Finish elastic waists at this time.
  11. Sew collar.  Prepare collar.  Make sure facings have been prepped.  Attach collar.
  12. Prepare sleeve.  Prepare any detailing like plackets, gathers, etc. before stitching the underarm seam.  Apply cuffs if applicable.
  13. Set in sleeve.
  14. Neckline/armhole facings.  Sew the neckline or armhole facings if there is no collar.
  15. Dress waist seam.  For 2-piece dresses, sew bodice to skirt at waistline.
  16. Apply zipper.  For dresses with waistline seams, add the zipper now.
  17. Finish hem.
  18. Closures.  Buttons, buttonholes, hooks and eyes, frog closures, snaps should be sewn at this time.
  19. Belts, bows or additional trimmings may happen now.
  20. Always Press As You Sew!
 
The more you sew, the more your confidence grows.

(Adapted from Industry Guide to Sewing Order by Connie Crawford)


(PS - Sometimes I really detest Blogger...I simply couldn't get the text and the images lined up where I wanted them to display...But I'm sure you'll get the picture.  LOL)

Dec 18, 2012

Does Sure-Fit Designs Give Sewing Directions?


Help...How do I sew this together?  I often am asked if Sure-Fit Designs™ provides sewing instruction steps.  Beginners using Sure-Fit Designs™ are particularly concerned that they might not know how to sew the garment together and what should happen first if they design the pattern themselves.

Even though Sure-Fit Designs™ is primarily a fitting and designing system, there are sewing construction steps provided for specific designs in the Dress, Pants, Shirt, Children’s kits and in the Men’s Instructional Package.  This resource guide is posted as an article on the website - www.sfdLearningCenter.com, but I know some of you reading here don't typically go to the website for information.  

So here’s where you’ll find the information and though construction illustrations are not always provided, the instructions tell you what to do and in what order.
Pants Kit:
  • How to sew basic pants together is provided on page 11 of the Pants Kit Instruction book
  • Sewing jeans is provided on page 23.
  • Sewing an elastic waist is on page 24.
  • Inserting a pocket opening (eliminates the need for a zipper and is extremely comfortable) is on page 25.
  • Inserting an inseam pocket is on page 25.
  • Sewing a zipper fly front is on page 27.

Dress Kit:
·        Bodice sewing construction steps are found on the following video tutorials.


Shirt Kit:
·       General instructions for sewing the shirt are on page 13 of the Shirt Kit Instruction book.
·       Sewing robes are found on page 17.
 

Children’s Kit:
  • General instructions for sewing elastic back pants are found on page 16 of the Children’s Kit Instruction book.
  • How to insert a zipper fly front is on page 17.
  • How to attach a bib to a waist edge is on page 18.
  • General instructions for sewing a shirt/blouse are on page 20.
  • Sewing a child’s cross-over shoulder T-shirt is on page 21.
  • Sewing a hood on to a neck edge is found on page 22.
  • How to sew a tab neckline treatment is on page 26.
  • General skirt sewing instructions are on page 27.
  • How to sew a tab front is found on page 29.
  • How to sew children’s robes are on pages 30 & 31.
  • How to sew a girl’s party dress is on page 32.

Men’s Instructional Package:
  • General sewing construction steps for men’s pants is on page 10.


Additionally, all the newest Fashion Leaflets and book/DVD combinations provide fully illustrated sewing steps. 
Newest downloadable leaflets:

Newest book/DVD combinations: 
(Each book/DVD is designed specifically to go hand-in-hand with the SFD Pants Kit, Shirt Kit and Dress Kit.)

In an effort to give you sewing construction guidance, first analyze your current resources.  Did you know all of this existed in the Sure-Fit Designs™ kits, patterns and leaflets?   

Do you have a stockpile of existing commercial patterns?  The sewing steps provided on the accompanying guide sheets provide an excellent source of instruction.  Their pattern may not be exactly what you are wanting to sew, but if there is any similarity in design to what you are creating, their instructions can be a great resource.

Do you have any general sewing construction resource books?  There are a number of comprehensive books available that not only provide construction techniques, but will also provide step-by-step procedures.  My favorite is the Vogue Sewing Book.  It’s a thick resource guide and well worth the investment.

What do you recommend as your favorite how-to sewing reference book?

Dec 11, 2012

Getting that darned Crotch Curve to Fit!!!

So many women are on the seemingly never-ending search to find a crotch curve for their pants pattern that will fit their exact body shape and contours.  And so you should be, because a well-fitting crotch curve is one of the key ingredients in the perfect fitting pants.

The Sure-Fit Designs Pants Pattern has served so many so well over the past 30 years, but I know some of you are still skeptical.  Will if fit me???

Some of you will definitely fit 'straight-out-of-the box'.  Others of you may need to do refinements or minor tune-ups.  At Sure-Fit Designs, we provide all kinds of help for you.  You can watch any number of free videos on pants fitting at www.sfdLearningCenter.com/VideoLibrary.html.

But, I'd also like to share with you one of the Sure-Fit Designs (SFD) customers, who has tried many different pants patterns, many different experiments with 'bendy curves and butt tucks' to get just the perfect crotch fit, and ended up coming back to the SFD Pants pattern for her best and excellent fit.

In essence, Joy (from Joyful Expressions), shows how she manipulated the crotch curve with a 'butt tuck', and ended up with the pants shaping her backside, but that alteration changed the hang of the leg.  And if you pinch out a fold in the side seam, it helps to remove these diagonal wrinkles.
But then she says...'I had the choice of fixing my blueprint by adding the tuck from the outside leg, or starting over.  I decided to start over with a new SFD pants drawing and just TRUST the fit as it came out with NO CROTCH CORRECTIONS. 

I happened to have about six yards of this lightweight camo fabric in the closet that I bought when my 20-year old grandson was a little boy.  I decided he probably didn't want his Grandma making him camo pants anymore, so I pulled it out of the closet to use for my "muslin".  Here's how it turned out:


Even though we can't see all the great fitting details in this camo fabric, you can tell from an overall view that the fit is excellent.

For those of you who still might be skeptical about the results that Sure-Fit Designs can offer, I hope this has alleviated some of your concerns.

You can read Joy's complete post at http://joyful-expressions.blogspot.com/2012/11/pants-pictures-praise-for-sfd-and.html.

And if you'd like to investigate the SFD Pants Pattern a little more, please go to: SFDLearningCenter

Dec 4, 2012

December '12 SFD Sale

Have you had at least 3 or 4 'wadders' in your sewing career?  What's a 'wadder' you ask?  I know you all know...it's the project that ended wadded up and in the trash can.  Of course, this can happen for any variety of reasons - it didn't fit, you didn't like the fabric when you thought it would be perfect, sewing construction 'oopses' happened that were not correctable.  The one I hear the most - 'it didn't fit'!

By the time you've bought the pattern, which we all know can range from very little up to the $20+ range, and bought the fabric, anywhere from $5 to $15 per yard or more, and of course all the accessories you need to complete the garment, it doesn't take long if you have 3 or 4 wadders to realize that you now covered the cost of some Sure-Fit Designs kits.

It's not frequently that I put any of the SFD kits or Designing Stylus 'On Sale', but for one week only, December 4-11, 2012, you can purchase that long-desired Dress or Pants kit and/or the Designing Stylus at a savings.
This photo shows you the patterns, templates and instruction book found in the Dress Kit.  It's regularly $41.95, but now on sale for $35.95 (+S&H).  Enter Coupon Code SFDSale after you've put the item in the Shopping Cart. Click Here.


The SFD ladies Pants Kit contains the necessary master patterns - Pant Front & Back, Waistband, Patch Pocket, Inseam Pocket, Zipper Fly Front Extension and Zipper Guard - and the Pants Kit Instruction Book (28 pages).  It's regularly $34.95, now on sale for $29.95 (+S&H)Click Here.  Enter Coupon Code SFDSale after you've put the item in the Shopping Cart.


If you need a Designing Stylus, they are on sale too.  Most of you know that the Designing Stylus is the Key to the System and is required for drawing off your body blueprint from the Master Patterns.  One Designing Stylus does it all - use it for all 4 of the SFD pattern kits.
It's regularly $18.95...now you can pick one up for $16.95 (+S&H).  Click Here Enter Coupon Code SFDSale after you've put the item in the Shopping Cart.

This (rare) sale ends December 11, 2012 , so order now.

Nov 27, 2012

Can't See the Dots?

Once of my SFD customers passed on a great tip.  She was having trouble distinguishing the measurement dots.  I know some of them are pretty close together (LOL).  She suggested using the smallest removable paper dot to identify her measurement numbers.  
Amazon carries these 1/8" (about 3mm) wide dots.  And perhaps your local office supply store does too.  It's a good way to make sure you're using the right measurement dot.   And since they come in various colors, if you were drawing the body blueprint for more than one size, you could color code where the dots are to be traced.

Then when you put the tracing vellum over top of your master pattern, they are totally clear and easy to find and the pencil dot should be easier to initially see.  When your done, the dots are easily removed.

Great suggestion Susie...Thank you!

If you have any other tips or techniques you use when drawing your Sure-Fit Designs master patterns, please comment.

Nov 20, 2012

Help! My Pattern Doesn't Fit


I don’t hear this comment very often, but when I get emails or phone calls and someone says ‘My pattern’s skin tight’ or ‘My pattern is too big’, it always is important to first check that you’ve drawn your pattern correctly.  And it’s not just drawing the pattern according to the simple SFD steps, but also that you’ve added seam allowances and cut and sewn the garment all accurately.

Here is a check list of variables that you need to check first because discrepancies with any of these can change the result of the final fit.  And if you prefer to watch the video where you can see what I'm talking about, just click on the forward arrow.

  1. Measuring.  Have you measured accurately?  Taking accurate measurements is always the underpinnings to getting a pattern fit to your body needs.
  2. Marking pattern dots.  Have you marked your appropriate measurement dots accurately?  Make sure to use a fine/medium tipped pencil when transferring the master pattern measurement dots on to your tracing vellum.
  3. Check drawn pattern widths.  Double check the widths of the resulting pattern before adding seam allowances.  Measure the pattern from stitching line to stitching line, adding any relevant segments together.  Make sure to account for the total circumference.  Compare the measurement that the pattern is giving to your actual measurement.  Remember that wearing ease is included in the master pattern.  Check the specific instruction book for ease in the pattern you are drawing.
  4. Accurate seam allowances.  Are the seam allowances 5/8” (1.6cm) wide?  With the Designing Stylus, use the edge of the seam allowance slot that is nearest the outside edge of the Stylus to draw the allowance.  Spot check for accuracy.
  5. Cut with care.  Whether using a rotary cutter or fabric shears, cut carefully maintaining the 5/8” (1.6cm) seam allowance.
  6. Stitch accurately.  Is the stitched seam allowance exactly 5/8” (1.6cm) wide?  If you need to, place a piece of visible tape on the throat plate 5/8” (1.6cm) away from the needle.
  7. Personal ease preferences.  Know how you like your clothes to fit.  The Dress Kit skirt pattern gives 3” (7.6cm) ease in the hip, while the pants pattern gives 2” (5.1cm) hip ease.  Some may find these ease allotments too little or too much.  It’s all a matter of personal preference.

When you change any of these variables, your resulting fit will naturally vary.  Please be aware of these aspects so that when you evaluate the fit of your test garment, these elements will no longer be causing any issues.

Nov 13, 2012

What to do? Short Front with Long Back Crotch

I've had a number of ladies in my SFD Pants fitting classes, who have a short front crotch with quite a long back crotch.  It could be due to your body stance or just basically your anatomy - the way you are.  And I've had ladies email with similar situations.

If this happens to be your situation, please make sure you watch this video.  It shows you exactly how to deal with your SFD Pants pattern.
Short Front Crotch in relation to a substantially Long Back Crotch

Nov 6, 2012

Large Upper Arm? Let's make the fix EASY!

There's  a lot of you out there with a large upper arm - a bicep that is fuller than many patterns provide for.  And I'm sure you've tried many different variations of how to enlarge the sleeve pattern to fit your larger upper arm.

Often when you widen the underarm, it automatically reduces the sleeve cap height.  Not good!  This just then binds on the top of your shoulder.  Typically, you need to widen the sleeve and maintain the cap height.  And after the frustrating fixes of slashing and spreading the pattern, this easy technique you'll find with Sure-Fit Designs, adds the width you need and usually you don't do anything with the cap height.  Just make sure you've measured the new back and front sleeve cap lengths and compare them to the current armscye lengths.  The back sleeve cap should have about 5/8" ease and the front should have about 1/2" ease.

If you add more than about 1" total width to the underarm width, you'll likely need to widen and/or widen and drop the bodice underarm point to accommodate this larger sleeve.

Take a look at this video to see how easy Sure-Fit Designs deals with this issue.

Oct 30, 2012

I Couldn't Believe My Eyes - Harem Pants!

The other day I was in my local Jo Ann fabric store, picking up fabric to go with my new paisley leggings.  I'm not sure what really possessed me, but I was flipping through pattern catalogues.  I guess I was checking current design ideas that could be easily drawn and sewn from your Sure-Fit Designs pattern kits.  And what did I see - Harem Pants!!!!  Oh my gosh!

This was in a Burda pattern book - pattern # 7677.  I looked at this and couldn't believe my eyes.  I designed what I called Harem Pants some time back in the early 90's.  Whether you have the older Pants Kit or newer SFD Pants Kit version, somewhere in there, you will find directions for designing Harem Pants from your SFD Pants pattern.  In the current Pants Instruction book, you will find these directions on page 21.

Here's the Burda pattern and it's also shown on a couple of models:

Now... here is the artwork for the SFD Harem pants.  This sure looks pretty similar to my eyes.  And it's all yours in your existing SFD Pants Kit.
Not only does Sure-Fit Designs offer this style, but you want to talk comfortable??  This style is so incredibly comfortable on so many different body shapes.

Here's our model, Cindy, showing you the Harem pants in action!

Do you remember a blog that I wrote a while back, called 'Everything Old is New Again'?  Well, here's another example of a current Burda fashion style...and you can smugly say...I already have that with my Sure-Fit Designs Pants Kit.

Enjoy,
Glenda

Oct 23, 2012

Creating a Thread Belt Loop

In Sew Sensational Shirts - Style #3: the Asymmetrical Wrap Blouse - I made a thread belt loop to hold the belt in place.

Here's the very easy way to make them.  Once you get the hang of it, you can do this in less than 5 minutes.  Give it a try!


Oct 16, 2012

What's wrong with this picture?

Glenda...pants...fit.....HELP!
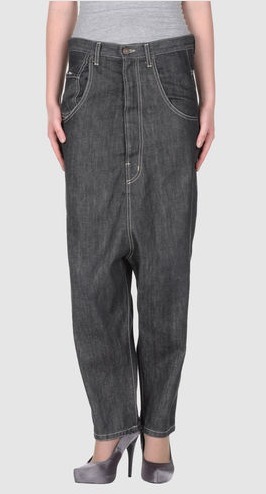
Becca sent me this photo.  Don't you just all too often see both sexes in ill-fitting jeans.  For the teenagers it may be a fashion statement...if you can call it 'Fashion'!  They walk around with the pants crotch hanging somewhere between their real crotch and their knees...and you wonder how they can take any kind of a walking stride.

Thank goodness that with the Sure-Fit Designs Pants Pattern, that after you've established your body blueprint (your pants sloper), you can design well-fitting jeans.  Instructions to do this are on page 22 & 23 of the SFD Pants Kit Instruction Book.

Here's Joy (Joyful Expressions) in one of her SFD jeans.

Oct 9, 2012

How Much Fabric Should I Buy?

When you begin designing/drawing your own patterns, after the pattern is drawn, I often get asked 'How much fabric should I buy?'  As you know, with Sure-Fit Designs, you're not working with a traditional pattern, where the envelop tells you how much yardage you'll need for your size.

Estimating your fabric yardage requirement is actually pretty easy.  I'd like to share with you some guidelines that I know will help you.

1.  If the design you are going to sew is similar to one of your existing commercial patterns (you've all got mountains of old commercial patterns in your stash), simply use their recommendations as a guideline.

2.  Do a mock-up of a layout.  Once your pattern pieces are all drawn, simply mark off a width (on your cutting/sewing table) that is half the width of the fabric.  Many fabrics are 58" to 60" wide, so half this amount would be 29" to 30" wide.  Mark one edge as the "Fold' and one as the 'Selvage'.  Then begin laying down your prepared pattern pieces.  Many of you are so familiar with doing layouts that this will come second nature to you.  Those pieces that are on the fold, will be placed first, and then you will fit in the other pieces.  When you're done, measure from one end to the other - and that's how much you need.   You might want to purchase another 1/2 yd. for safety. There is a clear illustration on page 13 of the Sure-Fit Designs Dress Instruction book on how to do this.

3. Your height and girth will play a role in your requirements, but after you've done this process a few times, you'll get to know how much you need.  As an example, you'll start to remember you need 1.5 yards of 60" wide fabric for pants or 1 3/4yd. for a long sleeve blouse.  Make a little note and tuck it in your handbag.

4.  And when all else fails, you can generally buy 2 1/2 yards and get many different designs from this quantity.  You really will start to understand your needs.

Kindly,
Glenda

Oct 2, 2012

LEGGINGS...Sizzling...Comfy...Fit...Fashionable!

Are leggings for you?  They were in vogue in the 60's and very trendy in the 80's and now they're ubiquitous once again.

Olivia and John (Olivia Newton-John and John Travolta) got physical in Flash Dance.  And, everybody, particularly the younger generation wore leggings.  As trends always do, they disappeared, tucked away in some dark fashion cupboard only to re-emerge as the century rolled over.  Now, everyone is wearing them and they've once again become a wardrobe staple.

Are leggings for you?  If you wore them then, do you remember how comfortable they were?  That's of course, if they fit you properly.  Now when you use your Sure-Fit Designs Pants patterns as a base, you'll end up with the fit designed for your body shape.

So, are leggings right for you?  They can be worn for so many different occasions.  I've made some snazzy black/gold paisley leggings and teamed them up with a gold lame knit cowl neck blouse and the diagonal hemmed cardigan (both from Beyond Bodice Basics). 
Or you could team them up with the Crossover Shoulder T-Shirt from Sew Sensational Shirts to create a much more casual look.
Or, have them look more like tight pants with a flared hem.  These ones are shown with the Asymmetrical Wrap Blouse also from Sew Sensational Shirts
These new instructions for Leggings by Sure-Fit Designs give all kinds of details for working with two-way versus one-way stretch knit fabric and gives detailed sewing construction steps.

Watch this short video, then hop on over to the SFDLearningCenter Store to get your copy of these instructions.


And how to accessorize?  My suggestion is to generally have layers of tops and have at least one of those items be as long (or longer) than your low hip level.

Wear them for dress-up, casual, day wear or gym wear and don't forget those heavier leggings to warm you in the winter.

Enjoy...
Glenda

Sep 25, 2012

It won't rip your Master Patterns!

I have just recently been introduced to Scotch Brand Removable Tape.  This is the most exciting thing since sliced bread!  I absolutely love it and it's perfect for taping the tracing vellum to the SFD Master Patterns.

I've had numerous customers email asking what tape to use when laying the tracing vellum over top of the Master Patterns.  Regular plastic tape will often rip the top layer of paper fibers off the Master Pattern.  I'm sure many of you have watched some of my educational videos showing you how to use the SFD patterns, and have noticed the blue tape I've been using.  That is the blue painter's tape.  I still use it to secure the Master Patterns to the wall (so that I don't take the surface of the paint off the wall when I remove them).  This blue tape also has worked well enough when taping the vellum to the Master Patterns.  But in a recent hands-on fitting class I just gave, one of my students brought this Removable Tape.  It was the first time I'd ever seen it.

In this photo, I know you can hardly see it, but the Tracing Vellum is taped on to the Master Pattern in the upper right corner.  (And don't you just love this tracing vellum?  It really is so clear, durable and see-through that it's difficult to take a picture showing you that it is laying on top.)  When I took the display down, the tape pulled off like magic - no rips or tears.  I know they can't call it magic tape, since that name is already used for another product.  But it certainly works well for our SFD purposes.    You should be able to purchase this Removable Tape in most office supply stores.

Kindly,
Glenda

Sep 18, 2012

Adding a Shoulder Dart

There have been a few ladies with rounded shoulders (not just rounded backs) who have asked how to add a shoulder dart to either the Dress Kit Back Bodice or to the back of the Shirt pattern.  Here's a simple technique for adding a shoulder dart.


Step 1.  Draw line A to B as illustrated.  This line should be at a level where the most rounding or protruding fullness is on your back.  Then draw line C to D as shown.  This line does not have to be at a right angle to A-B, but the angle that you choose will affect the final position of the dart therefore, it should be at a pleasing angle for your specific body shape.  You may need to sew a couple of tests to make sure you’re pleased with the results.
Step 2.  Cut from A to B and from C to D, leaving a paper hinge at the armscye and at point D on line A-B.
Step 3.  Spread the shoulder area of the pattern open as shown always maintaining the paper hinge points.  This will open up a small dart shape in the shoulder seam line and will automatically lengthen CB.  Often people with rounded, protruding shoulder blades also have some rounding at the upper back and this extra length will help the bodice/top to sit more comfortably.  Additionally, depending on how rounded your entire back is, you may also want to add a CB seam which is shaped/curved to suit your body contours.  For Rounded Back instructions, see Page 14 #3 in the Minor Tune-Ups section of the Dress Kit Instruction Book.
Step 4.  This technique for adding a shoulder dart shouldn't distort the armscye significantly. However, if the armscye appears too angled at the armscye hinge pivot point, make sure to blend/true to create a smooth curve.

Sep 11, 2012

Sheer Experiences


Sheers are quite popular right now.  I love animal prints, and this particular piece kept saying ‘Buy Me’.  So I did.  It’s a drapable sheer which I thought would be pretty sewn up as the Asymmetrical Wrap Blouse.  This design has a turn-back lining and then cascades down to the hem.  So far, so good!

Then I underlined and lined this top.  Here’s where I think I made a bit of a tactical error.  I underlined in black, then, lined it with fashion fabric.  When the front drape is flipped back, of course, you see the fashion fabric.  Ultimately, I think it would have been prettier and more dramatic to simply have lined the entire blouse with the black.  Then when the front flipped back, the black would have cascaded downward.  It definitely would have added more drama.  So when it was all said and done, I decided the next best thing was to use a contrasting black belt.

I ended up making my sheer blouse opaque.  This was partly by design because I’m always cold no matter whether we’re in the heat of summer or the dead of winter.  I didn’t want a flimsy, see-through top.  I didn’t want to feel cold.  And I didn’t want to have to think about wearing T-shirts underneath for this to feel comfortable.

The other issue that popped up once I donned the finished blouse, is that the fabric had a gold thread running through it.  I loved the sparkle, but forgot the ‘scratch factor’.  My skin is very sensitive.  Oh well, for short periods of wearing, I likely can survive.

The pattern is actually Style #3 – the Asymmetrical Wrap Blouse – from my latest book/DVD, Sew Sensational Shirts.

To see all the tips and techniques of working and sewing with a sheer, please follow this link to the extensive article ‘Sheer Sew-How’ that I’ve recently added to the Article Library in the SFD Learning Center.

Now, take a look at Margaret.  Her sheer blouse is just that – SHEER.  She is wearing it over top of a complimentary colored tank top.  Change the color of the tank top and present a totally different effect.  It’s beautiful, Margaret, and you look so comfortable in it.  Well done!
(Permission from Margaret and Joyful Expressions)

Sep 4, 2012

Sew September! National Sewing Month

September is National Sewing Month (in the USA).  I thought it might be a nice idea to brainstorm with you as to why you sew.  I'll start the list and I invite you to add your comments and reasons why you sew.
  • Sew because nothing fits to your liking in R-T-W.
  • Sew because it provides you a creative outlet.
  • Sew for the fun of it.
  • Sew because you love it.
  • Sew for fellowship.
  • Sew for inspiration.
  • Sew for style.
  • Sew for comfort.
  • Sew for unique, distinctive clothing.
  • Sew for quality construction.
  • Just sew...because you can!
Please feel free to add your comments.
Kindly,
Glenda

Aug 28, 2012

Have You Fallen off the Waist/Crotch Grid on your SFD Pants Pattern?

If you have a thick waist and fairly short front crotch length, when you are drawing off your SFD Pants Front Pattern, your numbers may fall off the Waist/Crotch Grid that is provided on the Pants Master pattern.

The remedy is so logical (as are most solutions with SFD).  You simply extend the grid lines.  I've posted a short, but informative article on drawing the solution on Adapting & Drawing the Waist/Crotch GridThis article is found in the SFD Learning Center - Article Library.  There's also a couple of photos of a what one person's body looks like with this situation and required this solution.  You'll want to check out this article.

I hope you can see the photo of how easy this is to do. 

And as always, contact me if you need more assistance.

Kindly,
Glenda

Aug 21, 2012

Everything Old is New Again


Not too long ago, in fact it was in the May 31, 2012 edition of the Wall Street Journal, I saw this article called: Jean Mutation: How Red, Pink and Mustard Took Over.  It says ‘Bye, Bye, Blues…J Brand jump-started the color trend in Feb. 2011.  Since then, many denim brands have followed with bright, distinctive hues such as mustard, green and red.’  The article’s author, Christina Binkley says, ‘It’s hard to miss the season’s most prominent denim trend: blinding color!’

Here’s what they look like.
 
Now, let’s jump back to 1984!  Here I am in my SFD hot pink jeans with turquoise blouse trimmed in hot pink.  They were skinny, very trim fitting jeans designed from the SFD Pants Kit.  I may not be tall and skinny or wearing high platform shoes, but I loved them!
 
Though they wouldn’t fit me now, you can see why I say ‘Everything old is new again!’  If you wait long enough, the fashion cycle rolls back around and our old clothes become the newest fashion.

Kindly,
Glenda
P.S. - Yes, my husband's shirt is from the SFD Shirt Kit.  My blouse is from the Dress Kit.

Aug 14, 2012

Finishing a Knit Top V-Neck

There are often many different ways to accomplish any task - like how best to finish off the raw edge of V-Neck T-shirt or top.  I'd like to share with you an easy technique that my friend Joy - from Joyful Expressions - uses very successfully.

Joy not only has written instructions, found here - Joyful Expressions - but she has also prepared a video tutorial on finishing the knit V-neck.  I encourage you to watch it.  You will notice that she is using her Sure-Fit Designs Dress Kit bodice for her pattern.  (Joy has made so many SFD blouses and tops, that she has a body blueprint (personal sloper) for working with both wovens and knit fabrics.  Also, you'll likely notice that she has moved the side bust dart down into the lower side seam.)

During this tutorial, she shows you how to draw/trace a facing for the neckline.  In addition to her visual instructions, please realize that the written instructions for drawing a perfectly fitting facing are found on page 20 of the SFD Dress Kit Instruction Book.

This is a 2-Part Tutorial.  Here's Part 1.


Part 2
Thanks for sharing, Joy.

Kindly
Glenda

Aug 7, 2012

Technique: Stitching a V-Neck

Stitching a V-neck, which results in a sharp 'V' point when the facing is turned, is easy with this technique.

Begin by using a magic, disappearing marking pen or tracing paper to mark the stitching line for the V-neck.  This visually helps so that you can see where to stop the stitching to make the first pivot.

The facing has been prepared with interfacing and pinned in place to the neck edge.

When you are stitching the seam allowance (either 5/8" or 3/8" (1.6cm or 1.0cm), as you get to within 1" (2.5cm) of the actual 'V' point, tighten up the regular stitch length to become very tight stitches.  When you get to the point, leave the needle in the 'down' position and pivot the fabric around the needle until you are able to stitch across the point with one or two of these tiny reinforcement stitches.  Then pivot one more time before you begin stitching up the other side of the 'V'.  Keep the stitches tight and small for about 1" (2.5cm) as you sew up the other side, then lengthen the stitches back to normal to complete sewing the neck seam.

Here is a very clear illustration of what your stitching should look like.  I've exaggerated the illustration of the stitch length so that you can see where the stitches begin to get tighter.


Once you've competed stitching the neckline, very carefully clip through the seam allowance up to the 'V' point.  You may want to stop the clip back a very short distance, then clip diagonally to each pivot point.  Be very careful NOT to clip through the stitches.  You will also want to trim away any excess seam allowance to almost nothing right at the point.  But for the remainder of the seam allowance, you should leave enough trimmed allowance to allow for understitching. 

The purpose of stitching across the bottom of the 'V', allows for the 'turn of the cloth' when the facing is turned to the inside.  And, understitching the facing to the seam allowance helps the facing to lay flat on the inside.

This V-neck stitching technique is suitable for either knits or woven fabric.

Next week, watch helpful videos on making the facing lay flat on the inside of a V-neck knit top which are provided from Joyful Expressions.

Happy fitting and sewing,
Glenda

Jul 31, 2012

So Refreshing...So Summery!

Thanks for sharing your latest sewing projects and accomplishments.  Carolyn has created the most attractive summer outfit - bright and cheerful, yet delicate, refreshing and summery.
You'll want to read of her successful weight loss and as she continues to shed more pounds, Sure-Fit Designs is being used to help maintain her wardrobe.

To read Carolyn's complete comments about her progress and her wardrobe, visit Carolyn's Sewing Room.