Showing posts with label pants fitting. Show all posts

Oct 3, 2017

Sept 2017 Fit & Sew Retreat - a Photo Story

www.surefitdesigns.blogspot.com

The September Sure-Fit Designs Fit & Sew Retreat, with another 6 lovely ladies, concluded 9/21.  I've put together some photos of their journey from Day 1 when we began 3 days of Pants Fitting and concluded with 3 days of Bodice Fitting. 

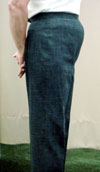
We had a variety of fitting issues, but all came out at the end with patterns that fit their unique body shapes.  Here's a selection of photos representing their journey.

Day 1 - the group photo


Then we began the bodice/blouse drafting & sewing.


The final group shot during our Celebration and Certificate event.

Happy accomplished students.
Well done everyone!


May 30, 2017

Princess Seam in Pant Legs

www.surefitdesigns.com and www.SFDLearningCenter.com

Do you ever get baggies under your backside?  This often resisted design feature can be a tremendous benefit when getting pants to fit beautifully under your buttocks.  This is such a functional addition to your pants that it is definitely worthwhile repeating the information on how to add the Princess Line to either the Back or Front pant leg.

Let's take a look:


Step 1 - Extend the grainline through to the waist edge and hem level.
Step 2 - Draw/move the dart so that it now straddles either side of the extended grainline.  Curve the dart tip slightly.
Step 3 - Draw new grainlines on the Side Back and Center Back section equidistant from the original grainline.
Step 4 - Draw double matching notches at the top and bottom to help aid in sewing the 2 pant leg sections together.
           **Label each pattern section as Side Back and Center Back.

Step 5 - Cut the two sections apart.  Add a strip of tracing vellum so that you can add the appropriate 5/8" (1.6cm) seam allowance to each cut edge.  Extend the matching notches onto the seam allowance.
Step 6 - Curve and shape the princess line seam to shape the fabric under your backside.  This curved stitching line can be more or less curvy to best conform the fabric to the shape of your body.

Here's a video showing how to add the princess seam to the front of the pants leg, but no matter whether you insert it into the front or back pants leg, the process is the exact same.  (This video most likely will not show up in your email software - if that is where you are reading this blog.  You will need to watch it in either your tablet or computer).


  See the great fit in the back of these cropped leg pants.


Happy Fitting!
Glenda...the Good Stitch

Mar 28, 2017

Oh my Flat Backside!


Do you have a flat backside?  If you do, you might experience bagging under your backside when wearing pants.
In this video, see how to refine the fit of the pants back when drawing the Sure-Fit Designs™ Pants pattern to accommodate a flat backside.  This is a common issue for lots of women and men and no matter your gender, the process to resolve this issue is the same.

And for some crazy reason, you can no longer view these videos when looking at your emails.  You will need to click through to my web page where all these short video tutorials are listed.  Please go to http://www.sfdlearningcenter.com/Pants-Videos-RefiningFit.html  

I know the videos are in a small viewing format.  That's to reduce file size with the hosting company I use.  However, you can easily click on the title of the video and will automatically open up in YouTube where you can watch it in a larger viewing format.

Happy Sewing...
Glenda the Good Stitch
   

Feb 28, 2017

How to Divide your Crotch Measurement for Front and Back Lengths


Let's just call this a Vlog - a blog in video format.  We have been re-doing some of our very original instructional videos on working with the Sure-Fit Designs pants pattern.  This particular video shows the easy process of  taking your total crotch length/your straddle measurement and dividing it so that you end up with a back crotch length that is longer than your front crotch length...which is exactly the way it should be.  I do know some of you have excessively long back crotch lengths in relationship to shorter front crotch lengths, but that's the topic of another video.  I hope you enjoy this.  You'll no doubt need to go into a web browser to watch this because you likely won't be able to see the video while reading this in your emails.  Go to this page - http://www.sfdlearningcenter.com/Pants-Videos-General_Info_Measuring.html and look for video - P.3 Crotch Length - How to create your Front & Back Crotch Lengths for your Pants pattern.  And while you're there, check out some of the other videos that might be relevant to your pants fit.


Kindly,
Glenda the Good Stitch

Jan 31, 2017

Identify Common Hip Shapes and why the Sure-Fit Designs™ Pants Pattern w...

www.surefitdesigns.blogspot.com

I thought you would like to see one of our latest videos.  We are re-doing some of the very first and very old videos and updating them with new information.  I'll post more as they become available.

I hope you enjoy this latest video on identifying your hip shape and how the Sure-Fit Designs Pants pattern will accommodate all shapes and circumferences.


What shape are you?  Click on the forward arrow below on the video.


Happy Fitting & Sewing!
Glenda...the Good Stitch


Jan 24, 2017

September 2017 Fit & Sew Retreat now available for Registration

www.surefitdesigns.blogspot.com

 Would you like to attend a Sure-Fit Designs

hands-on Fit & Sew Retreat?


I know it seems a little early to be planning your Sept 2017 activities, but we all live such busy lives that I know planning ahead is important.

The September dates for the Retreat are Sept. 16 - 21, 2017.
You'll receive 6 days of fun, along with the pants and bodice fitting instruction and projects.  I teach this Retreat at an awesome sewing studio in Springfield OR - just across the freeway from Eugene OR (where Sure-Fit Designs is headquartered).

To register - call Glenda at 541-344-0422 (Pacific Standard Time).

To see where you'd spend 6 concentrated fitting days, watch this video below.  We recorded this live video this past August.  A good time was had by all...and a lot of learning occurred.  To watch this short video below, this blog needs to be viewed in a web browser (not in your emails).  Please click here to view - www.surefitdesigns.blogspot.com


To see all the details for this Fit & Sew Retreat, please click here.

You'll receive:
  • 3 days Pants Fitting
  • 3 days Bodice Fitting
  • Pattern drafting/drawing experience with the Sure-Fit Designs patterns.
  • Gift bag including drawing/drafting supplies
  • Non-stretch elastic for your Yoga/Travel/Comfort pants project
  • Waistband interfacing
  • High cutting table – 1 per student – personal work space - no need to share your space
  • Use of a sewing machine and serger – no need to bring your own
  • Transportation to and from the hotel to the sewing studio
  • Fabric shopping field trip - Thursday.  There are 2 (small) fabric stores within walking distance. 
  • Farewell event


  • Join the comraderie of other like-minded seamstresses.


    Hope you can join me!
    Glenda...the Good Stitch!

Jul 19, 2016

What a Difference Leg Width Can Make

A recent student at the June Fit & Sew Retreat had a great-fitting pants blueprint (sloper), and though the pants fit really well in the waist, hips and crotch locations (the most important ones), she preferred to have a narrower leg width.


In the following photo, you'll see I've identified the shape of the leg seams with the regular pattern leg width being highlighted in yellow and the narrowed leg with is highlighted in red.


Please always keep in mind that leg width is not a 'fit issue' - it is a personal preference.  To help you with narrowing the leg width of the pants pattern, you might want to take a look at the following video.

Happy fitting and sewing!

Aug 25, 2015

Adapting and Drawing the Pants Front Waist/Crotch Grid for a Thick Waist and a Relatively Short Front Crotch Length

If you have a fairly short front crotch length measurement and you have a relatively thick waist, when drawing the pants pattern, you may find that your numbers 'fall off the Master Pattern Grid lines'.  This situation may occur when you are establishing the intersecting point for your waist measurement and front crotch length measurement on the Pants Front Waist/Crotch Grid.  In other words, the grid lines stop before your two numbers of waist measurement and front crotch length measurement have a chance to intersect.  These photos show and example of the type of body shape where this may occur.
 If this occurs, simply extend your appropriate grid lines straight down.  The waist measurement line (attached to your waist measurement number) will be drawn straight down.  The front crotch length measurement number will be extended downward but continuing on in its current angle and slope.

See the example diagram below where the person's waist measurement is 46" (116.6cm) and the front crotch length is 11 1/2" (29.2 cm).  Note how these lines have been extended and shown in continuous RED lines.  The BLUE dot represents where the two lines intersect.  This is where you would mark your placement dot for your CF waist measurement.  This dot, of course, would then connect (in either a straight or curved line) to your front side waist measurement dot.  And you would then continue to proceed to mark in your Dart tip and then your Front Crotch Pt. #1 and Pt. #2.  These steps are found in your Pants Kit instruction book, page 9, steps 9 and 10.


 Fine Tuning Your Pattern's Crotch Lengths - if Necessary
Once you have drawn your Back and Front Crotch lengths, also make sure you measure the finished lengths.  Since you are measuring a curve, remember to stand the tape measure on edge and walk the tape around the stitching line to ensure accurate length measurements.  The instructions and illustrations for this step are found in your Pants Kit instruction book on page 10, #13 - Fine Tuning Crotch Lengths.

Glenda...the Good Stitch!

Aug 11, 2015

Removing Horizontal Fold Under the Tummy

Some women experience horizontal fullness or bagging directly beneath their tummy and just before the crotch curve begins.  Once you've sewn your test muslin for your pants, if this is occurring, you will find one suggestion for a minor tune-up on page 12 (#1) of the Pants Kit Instruction Book.  This may be a satisfactory refinement for you.


Another alternative is to remove this fold of fabric at CF. Follow these directions:
1.  To determine how much you need to remove, pinch out the fabric in a tiny fold.  If you pinch out 1/4" (.6cm), this will mean that you will be totally removing 1/2" (1.3cm).


Close-Up of dart/tuck wedge from CF going to nothing at the side seams.


2.  Mark this level location of CF of the crotch seam.  Draw a perpendicular line (to the grainline) over to the side seam.  Mark point A and B.


3.  Cut from CF to side seam, leaving a small hinge of paper at the side seam. This will act as a pivot point.  Secure the pivot point with plastic tape.


4.  Overlap the CF seam the amount you require, thereby crating a small horizontal dart or tuck which begins at CF and goes to nothing at the side seam.

5.  True the CF crotch seam.

6.  The more you overlap at CF, the more the waist edge tilts down and angles the CF seam.  To maintain the original orientation of the upper CF seam, when you true the crotch seam, you will be crating a narrow wedge as indicated by the green arrow.  (The blue line indicates where CF at the waist edge originated).


7.  Cut/remove this narrow wedge and tape it back in place at the side seam waist edge.  This will maintain the correct waist circumference and true the side seam shape so that it will sew in the same curve to the back side seam.


8.  Redraw and reposition the front hip-fitting dart to best suit your body contours.

9.  Bring the straight of grain up from the leg.


This process will shorten the CF crotch length by the amount of the dart/tuck.  Be aware that you may need to add this amount on to the back crotch length so that you maintain your overall crotch length requirement.

Happy Sewing!

Glenda... The Good Stitch


Jul 21, 2015

Pants - Curving the Center Front Seam for the Protruding Tummy

As we age, many women develop a fuller tummy/stomach pouch.  Sometimes this is primarily at CF and immediately underneath the waist.  For other women, this rounding/fullness is not only under the waist, but it also spreads horizontally.

When you have this little belly/pouch, you will often experience fullness in the CF seam right underneath the pouch.

However, sometimes it fits just fine under the pouch, but you'll see drag lines/wrinkles pointing up toward the center of the tummy fullness.  If this occurs, then consider this CF crotch seam refinement.

Rather than maintaining CF as a 'straight line', it can be slightly curved right where the tummy fullness is located.


The result is that:
1.  You wouldn't be able to put in a zipper fly at CF - since you need a straight seam for this application.  But a zipper front might not suit your body shape anyway because of the tummy pouch.

2.  With a curved CF seam, you wouldn't want to sew with a stripe or checked fabric, as you'd end up with a 'chevron' effect at CF which likely wouldn't be that flattering.  Choose solid colors.

This added curvature doesn't need to be a lot to make a substantial difference.  So even though this refinement might sound a little strange, it really does work.

Here's a photo of a happy seamstress, as these are the best fitting pants she's ever worn.  In this photo, her blouse is tucked in to show the excellent pattern fit, but typically she only ever wears her blouses out over top of her pants.  This refinement really does work well!


Happy Fitting & Sewing!

Glenda...The Good Stitch

Jun 2, 2015

Double Back Darts

This topic of double darts at the pants waist edge is well worth repeating.  I just had to show you another example of how adding a second dart at the waist line of your pants pattern can really improve the fit.

If you go from a relatively small waist to quite full high hips, I highly recommend adding a second dart to the waist edge of your pants pattern.

This lady attended one of my recent Fit & Sew Retreats.  She has a pretty dominant swayed, dipped center back (at the waist edge), quite full low hip measurement and thin legs.

Here's the result:


She's always had difficulty getting any pants (or skirt for that matter) to fit.  That's why she attended the Retreat.

Keeping in mind these are test pants, where every wrinkle and nuance shows, you're seeing a near to perfect fit at the waist and in the hips and a beautiful hang on the leg.  From a side view you're seeing a perfectly straight side seam.  CF needed to be raised slightly, but that was refined in the tune-ups.

In the above close-up, you're seeing the position of the 2 waist-fitting darts.  They shape her hip shape well.

She did a great job of drafting her pattern and the results as so worth her effort.  Well done...and great fit!

To see how to add this second waist-fitting dart, please watch this short video tutorial.


For any of you ladies who might fall into this category, you'll want to give this a try.

Kindly,
Glenda...the Good Stitch!

May 12, 2015

Best Pants Styles for your Body Shape

I've recommended InsideOutStyle blog to you a couple of times...and here is a good reason why.  When you're looking for information on what styles look best on your body shape, Imogene Lamport, from InsideOutStyle, is the lady to ask.
 Here's a great and very informative chart on how to recognize what your body shape is and what style of pants would suit you best.
If you'd like to read more about how to analyze your shape, please click through to this page.
And from there, you know how easy it is to get the best fit possible when drawing and designing it yourself from your SFD pants body blueprint.

Aren't you glad you don't have to rely on ready-to-wear to supply you with well-fitting clothing?

Kindly,
Glenda...the Good Stitch!